
I’m constantly trying to improve my sketching kit — make it easier to carry around the necessities, and easier to access the tools I want to use. In particular, I’ve collected a few watercolour pencils, and these are particularly challenging to carry.
For the last year or so, I’ve been using a simple pencil case to store these pencils along with pens, brushes, and other tools. It’s been working OK, but I’m getting sick of digging through everything to find the tool I need.
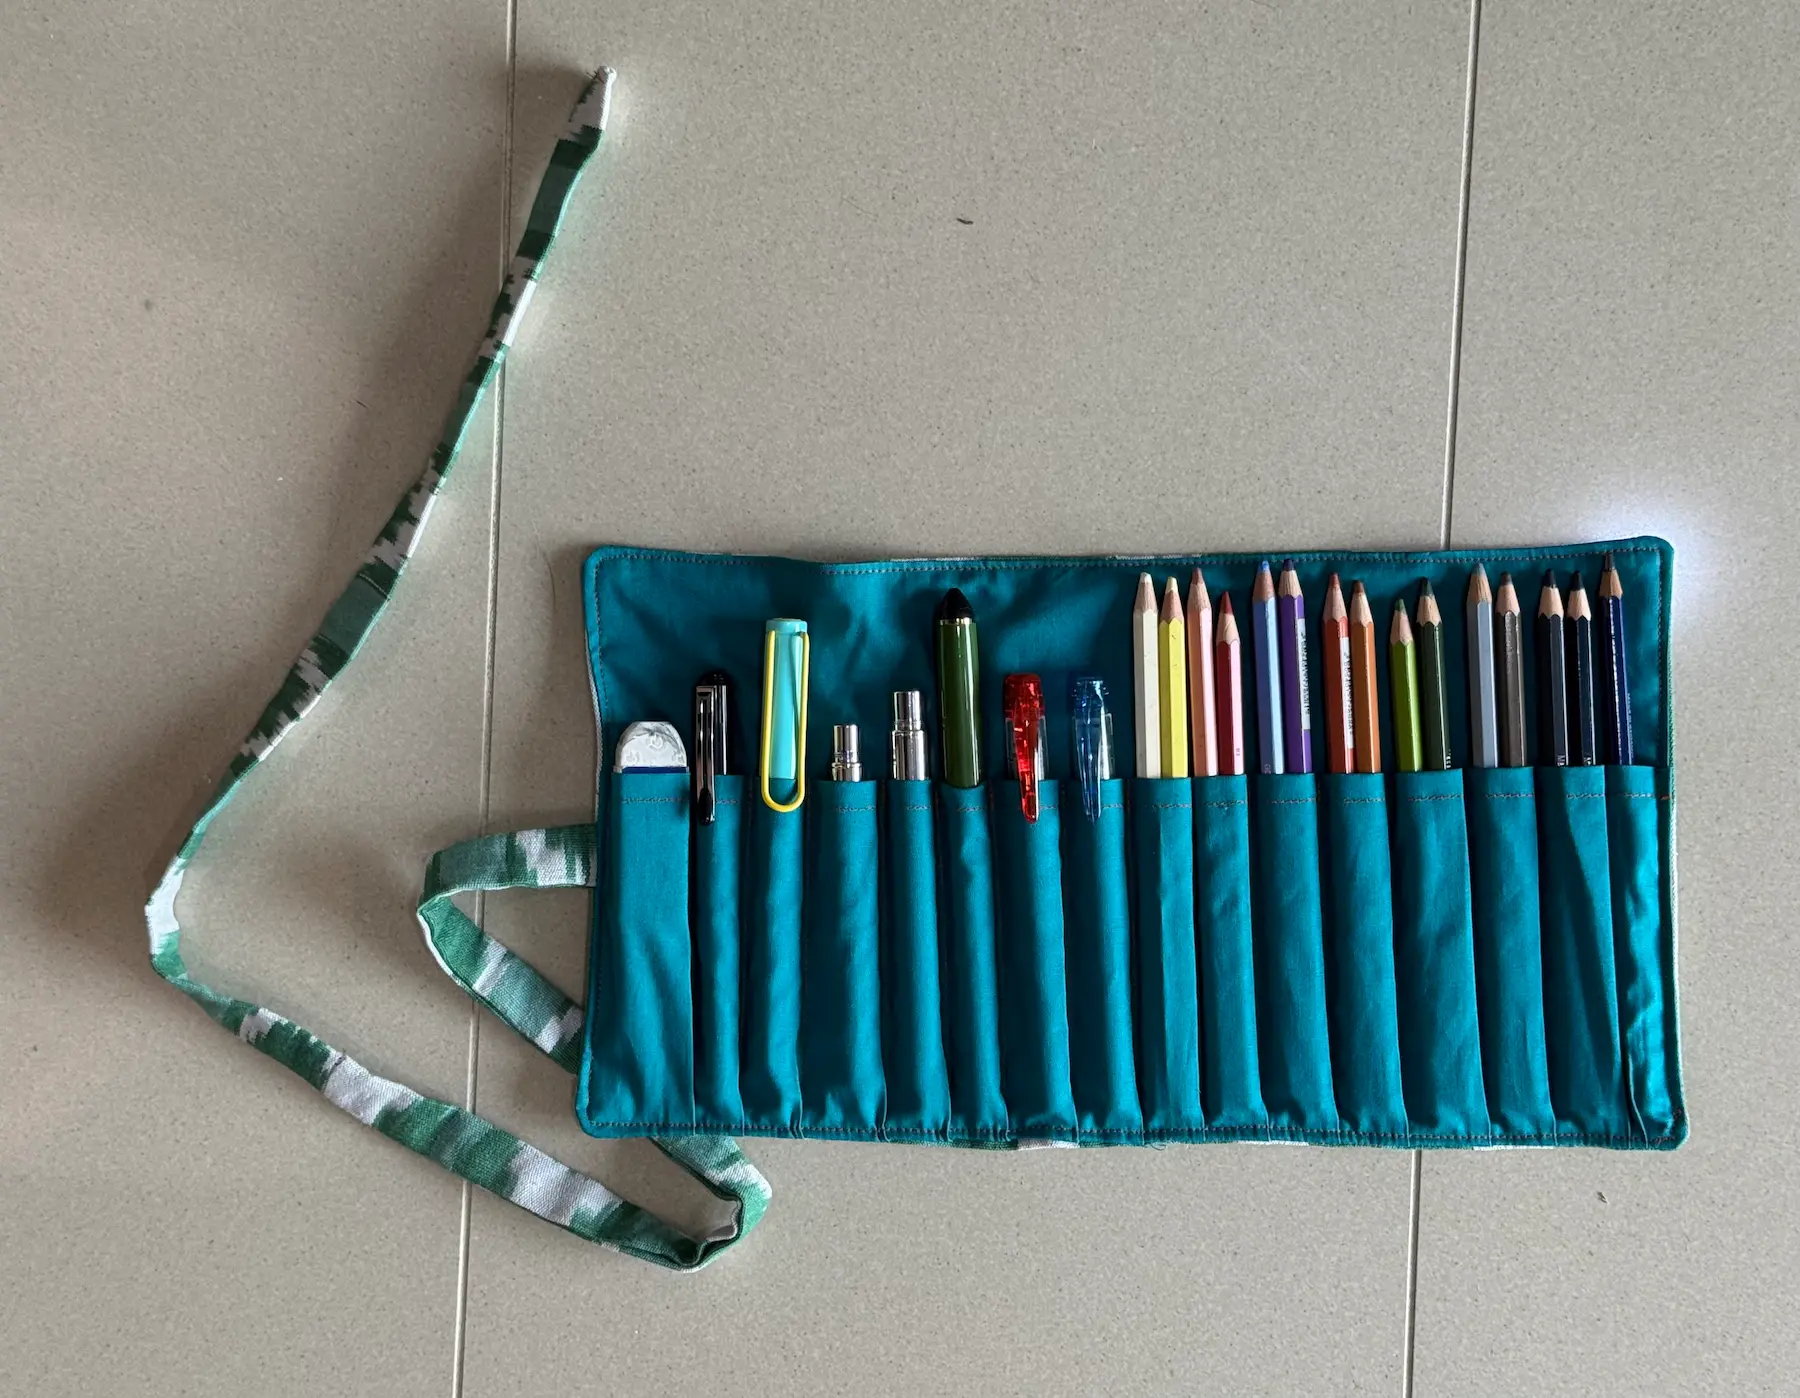
Researching alternatives, the one that stood out to me the most was a pencil roll. A pencil roll is basically a rectangle of fabric with slots to hold each pencil, pen, or brush, that can be rolled up into a tube to be transported. The benefit of this system is that all my tools are laid out in front of me, allowing me to find the one I need right away.
I browsed online stores for pencil rolls, but couldn’t find one in the size I needed, and they all seemed to be very expensive. This is often how my crafting projects start: I have something specific in mind that I want, I can’t find it to buy, so I end up making it.
I actually have a similar roll for storing crochet hooks, so I could look at that to understand its construction. Not bothering to do a lot of planning or patterning to make the pencil roll, I just jumped in and did one step at a time, figuring it out as I went.
First, I measured the length of my pencils and pens, and counted them. That way, I could estimate how long the roll should be. I also decided not to try to create an individual pocket for each pencil/pen, as that would require a lot of precision and I risk not being able to fit them in. Sewing wider pockets would allow me to put two pencils in each, or one wider tool like a brush pen or fountain pen.
I found some leftover upholstery fabric for the outside of the roll, and a matching solid colour for the inside. I decided on a contrasting colour thread, to create some extra detail.

Then, I stitched together a strip of the inner fabric to a larger rectangle of the inner fabric, and used vertical stitching to create the pockets.

Once all the pockets had been made, I then made the strap (a simple fabric tube), and sewed the outside fabric to the inner piece, right sides together, with the strap on the outside. Once I turned it inside out, the strap was sandwiches between the two layers. I then top-stitched around the outside of the whole piece to secure it.
It took just a few hours, and — as I used materials I already had — it cost me nothing.
And now I have a pencil roll!


Leave a Reply